

Essential Hand Tools for Residential Fire Entry
Table of Contents
- Why Tool Selection Matters for Residential Fire Entry
- Firefighter Forcible Entry Tools: The Core Kit
- Firefighter Tools to Carry: Practical Load Management
- Through-the-Lock Tools for Firefighters
- Forcible Entry Techniques and Tools by Residential Door Type
- Tool Maintenance, Inspection, and Safety Limits
- Common Mistakes in Tool Selection and Use
- Frequently Asked Questions
Last Updated: October 12, 2026
Why Tool Selection Matters for Residential Fire Entry
Choosing the right hand tools for residential fire entry determines how fast you access a structure, how safely you work, and whether your crew executes the entry technique without wasting critical seconds.
Residential fire entry presents unique challenges: doors vary in construction, frames differ in strength, and windows come in different styles. Knowing which essential hand tools for residential fire entry to use, and when, separates efficient crews from those that struggle at the point of entry.
This guide covers the core tools, how to match them to specific door and window types, and the common mistakes that slow entry.
Firefighter Forcible Entry Tools: The Core Kit
The foundation of any residential fire entry operation rests on a small number of proven tools, the essential hand tools for residential fire entry that appear on nearly every truck.
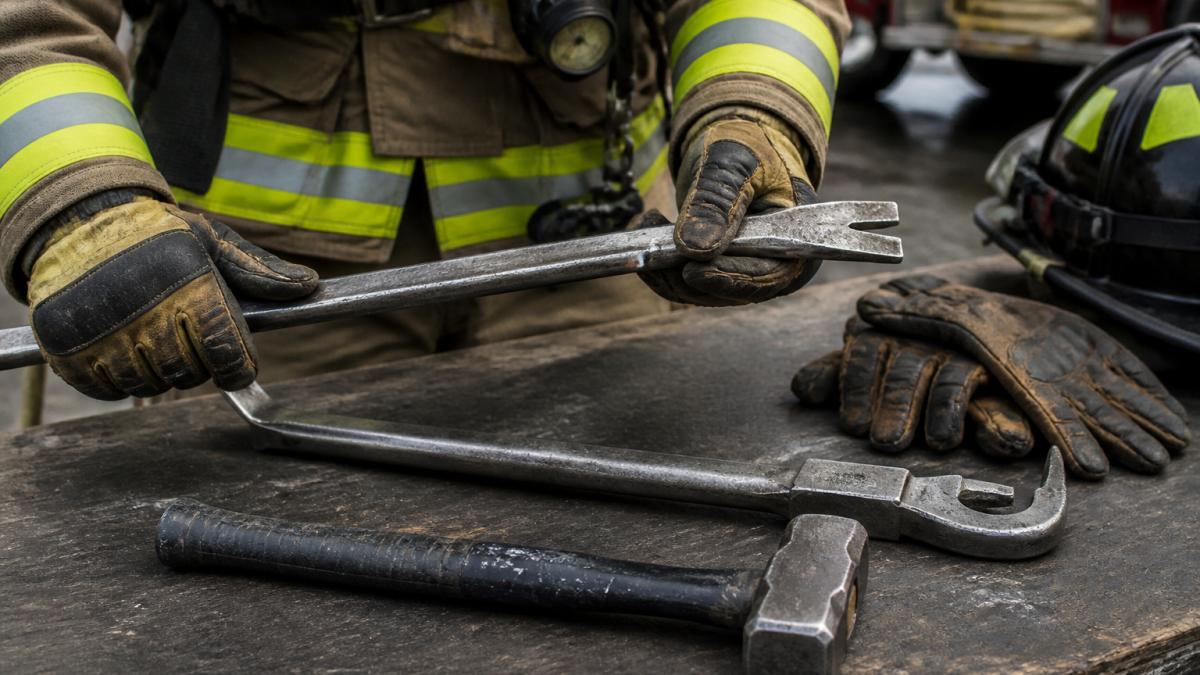
Halligan Bar and Hook: The Foundation
The Halligan bar, and its companion the Halligan hook, are the workhorses of forcible entry. Created by FDNY Chief Hugh Halligan in the 1940s, they remain the gold standard: the bar pries doors, the hook catches and pulls.
Most firefighters carry one or both. They work on nearly every residential door: the flat end slides into gaps, the curved claw grabs.
Black Helmet honors this legacy with the Hook & Halligan Premium Tee, a design celebrating the tools that shaped modern firefighting.

Pry Bars and Use Tools
Pry bars come in different lengths and weights. Shorter bars (12-18 inches) give control in tight spaces; longer bars (24+ inches) give mechanical advantage on stubborn frames.
The key principle is leverage: transfer force to the frame or lock mechanism rather than breaking the door with muscle.
Common residential applications:
- Door frames nailed tight to the structure
- Doors with multiple locks or deadbolts
- Frames that shift under pressure
Striking Tools
A striking tool, typically a flathead axe or sledgehammer, delivers focused force when leverage alone won't work, breaking hinges, shattering locks, or breaching frames that resist prying.
Weight matters. A lighter tool (4-6 pounds) lets you control your swing; a heavier tool (8+ pounds) delivers more force but costs control. Most residential entries use lighter striking tools because precision matters more than raw power.
Firefighter Tools to Carry: Practical Load Management
Not every tool fits on your belt or belongs on every call. For residential entry, separate a true minimum kit from optional equipment, then map tools to the tasks and crew roles on a one- or two-story house fire.
The Prioritized Residential Entry Kit
Think in tiers. Tier 1 is what you carry on the initial approach. Tier 2 stays on the truck until the task calls for it. Tier 3 is specialized equipment for specific construction or security features.
Tier 1, On you or in hand:
- One prying tool (Halligan bar or comparable multi-purpose bar)
- One striking tool (flathead axe or 6-8 lb sledge, matched to your prying tool)
- One through-the-lock tool (shove knife or key tool)
Tier 2, On the truck, staged for the entry point:
- A longer pry bar (24-30 inches) for stubborn frames
- A set of irons (matched bar and axe) for a second firefighter
- A rabbit tool or hydraulic spreader if your department carries one
Tier 3, Specialized, brought only when needed:
- Rotary saw with a carbide or metal-cutting blade for security bars and roll-down gates
- Reciprocating saw for hinges, deadbolts, and window frames
- Bolt cutters for padlocks and chains
Tier 1 plus a staged Tier 2 covers the overwhelming majority of residential entries. Tier 3 matches the tool to a specific obstacle, not carrying everything to the door.
Task-to-Tool Matrix
Use this as a training and equipment-planning reference, mapping the entry task to the tool and crew role most likely to perform it.
| Entry task | Primary tool | Backup tool | Typical crew role |
|---|---|---|---|
| Through-the-lock on a knob or deadbolt | Shove knife or key tool | K-tool | First-due firefighter at the door |
| Pry a residential door at the frame | Halligan bar or 24-30 in pry bar | Rabbit tool | Irons firefighter |
| Strike a lock, hinge, or frame | Flathead axe or 6-8 lb sledge | Halligan bar (as a striking surface) | Irons firefighter |
| Defeat a cylinder lock | K-tool or cylinder puller | Rotary saw | Irons firefighter or truck company |
| Open a window | Hand tools, then pry bar | Window punch | Outside vent or ladder firefighter |
| Cut security bars or roll-down gates | Rotary saw | Reciprocating saw or bolt cutters | Truck company |
| Force a steel frame or reinforced jamb | Pry bar plus striking tool | Hydraulic spreader | Truck company |
Weight, Carry Method, and Ergonomics
Weight and balance matter more than you'd think. A tool that feels fine at the station becomes a burden after climbing stairs in heavy smoke. A few practical patterns:
- Match the striking tool to the prying tool. A 6-8 lb flathead axe paired with a Halligan bar is the classic irons set. Heavier sledges deliver more force but cost control and add fatigue.
- Keep the prying tool in your dominant hand and the striking tool in the other so you can transition without swapping hands at the door.
- Stage, don't stack. Set the striking tool down at the entry point within arm's reach rather than carrying both tools through the structure.
Door Control and Accountability
Once the door is open, someone has to control it. A door chock, a strap, or a dedicated firefighter on the door keeps the entry point open for the hose line and the crew behind you.
Accountability matters too. Know who carries which tool and where they are. A missing Halligan bar at the wrong moment is a crew problem.
Through-the-Lock Tools for Firefighters
Through-the-lock entry is often your first attempt on a residential door. Unlocking without forcing the frame preserves the structure and is faster.
These tools require practice: you need to feel what's happening inside the lock and know the angle and pressure. A shove knife works on many residential locks, but not all.
When through-the-lock entry fails, you move to forcible entry, and your pry bar and striking tools take over.
Forcible Entry Techniques and Tools by Residential Door Type
Different doors demand different approaches. Understanding the door type, lock, and frame tells you which tool to use first, and whether through-the-lock, prying, or striking wins.
Residential Door Construction
Hollow core doors are common on interior rooms and some exterior applications, a thin skin over a cardboard or honeycomb core.
Solid core doors are heavier and denser, resisting prying at the face, so your leverage shifts to the frame, hinges, and lock area.
Steel doors are common on exterior entries, especially newer construction and apartment buildings.
Fiberglass and composite doors can crack or shatter under a striking tool, creating sharp edges and debris.
Residential Lock Types and Through-the-Lock Entry
Most residential doors use one of a few lock families, each responding to a different tool.
- Knob locks (cylindrical) are the most common. A shove knife or key tool can often reach the latch and release it. If the latch is deadlocking, through-the-lock may fail and you move to prying or striking.
- Deadbolts are single-cylinder or double-cylinder. Single-cylinder deadbolts can sometimes be defeated through-the-lock with a shove knife or key tool. Double-cylinder deadbolts have no interior thumb turn, so through-the-lock is usually not viable and you go to forcible entry.
- Mortise locks are found in older homes, set into a pocket in the door edge. Through-the-lock is difficult; prying at the lock side or striking the lock body is more reliable.
Frames, Hinges, and the Weakest Point
The frame is often the weakest part of a residential entry. Wood frames in older homes can split or pull away from the wall under a pry bar.
Hinges are a second option. Exterior hinges can sometimes be cut or driven out with a striking tool. Interior hinges are usually not accessible from the outside.
A common pattern is to attack the lock side first, then the hinge side, then the frame corner.
Window Types and Secondary Entry
Windows are secondary entry points, but they matter when the primary door is blocked or you need a second access for ventilation or rescue.
- Single-hung and double-hung windows have a sash that slides vertically. The lock is usually a sash lock at the meeting rail. Break the glass closest to the lock, reach through, and release it. If the sash is painted shut, pry at the meeting rail.
- Sliding windows have a latch at the meeting stile. Pry at the frame or break the glass near the latch and slide the panel.
- Casement windows crank open. The crank is on the interior, so from the exterior you pry at the frame or break the glass near the crank.
Breaking glass is loud and creates hazards. Always try to open the window normally first. If that fails, break the glass closest to the lock, reach through, and open it. Control the glass with a tool or gloved hand and keep your face and airway clear of the opening.
Matching the Tool to the Door
A quick reference for the door you are facing:
- Hollow core, wood frame, knob lock: shove knife first, then pry bar.
- Solid core, wood frame, deadbolt: through-the-lock if single-cylinder, otherwise pry bar and striking tool at the lock side.
- Steel door, steel frame, deadbolt: through-the-lock if possible, otherwise pry bar and striking tool at the frame corner or hinge side.
Tool Maintenance, Inspection, and Safety Limits
A tool that's dull, bent, or corroded becomes dangerous. It's slower to use. It can slip or break during critical moments.
Check for:
- Rust or corrosion (clean and oil regularly)
- Bent or warped metal (replace if damaged)
- Loose handles or connections (tighten or replace)
Store tools in dry conditions and keep them organized so you know what you have and where it is.
Know the limits of your tools. A pry bar has a breaking point, and striking tools can shatter on the wrong material.
Common Mistakes in Tool Selection and Use
Most firefighters learn through experience.
Carrying too much. Overloading yourself slows you down and increases fatigue.
Neglecting maintenance. A rusty pry bar is harder to use.
Forcing entry when through-the-lock works. Speed matters, but so does structure preservation.
Not training with your tools. Competence with forcible entry tools comes from practice.
Residential fire entry is a core skill in firefighting.
At Black Helmet, we celebrate the tools and traditions that define the fire service. Whether you're wearing our Hook & Halligan Premium Tee at the station or carrying your gear on the fireground, you're representing the legacy of firefighters who came before.
Frequently Asked Questions
What hand tools do firefighters use for residential forcible entry?
The core residential fire entry toolkit includes a Halligan bar with hook, a pry bar for leverage, a striking tool like a flathead axe or maul, and through-the-lock tools for deadbolt access. Additional small tools, flashlight, utility knife, door chocks, and spanner, support visibility and door control. Tool selection depends on door construction, crew role, and the specific entry task. Residential doors vary in strength; solid core doors require different technique than hollow core. Proper training ensures firefighters choose and use each tool safely and effectively.
How should firefighters choose hand tools for forcible entry?
Start with crew role and fireground assignment. Entry team members carry heavier striking and prying tools; search and rescue personnel carry lighter, multipurpose tools. Consider residential door types in your response area: solid core, hollow core, steel, or reinforced frames each demand different tools. Weight and carry method matter, tools must be accessible and not fatigue the firefighter. Durability and maintenance are critical; tools must withstand repeated use and harsh conditions. Finally, ensure training matches tool selection. A tool is only effective if the crew knows when and how to use it correctly.
What is the difference between a Halligan bar and a pry bar?
A Halligan bar, designed by FDNY Chief Hugh Halligan in the 1940s, is a specialized forcible-entry tool with a hook end for pulling and a pry end for leverage. It's engineered specifically for fireground entry operations and door control. A standard pry bar is a general-purpose tool that works for prying but lacks the hook design and fireground-specific engineering. The Halligan's hook end excels at grabbing door frames and controlling doors during entry, while a pry bar is better for general leverage. For residential fire entry, the Halligan's design makes it the preferred choice; it's proven over decades in the fire service.
What training is needed before using forcible-entry tools?
Firefighters must complete formal forcible-entry training before using these tools on the fireground. Training covers tool mechanics, proper striking and prying technique, door construction knowledge, and safety limits. Crew coordination is essential, entry teams must practice together to work efficiently and safely. Training should address residential door types, common mistakes (over-striking, improper leverage, tool misuse), and accountability procedures. Regular drills maintain competency. Some departments require annual recertification. Training also covers when NOT to use a tool and when to call for additional resources. Competency ensures faster entry, reduced injuries, and effective rescue operations.
