

How to Choose the Right Firefighter Helmet Accessories
Last Updated: November 7, 2026
Quick Summary
Choosing the right helmet accessories starts with your role and the hazards you face most often. Score each accessory against four filters: hazard exposure, interference with other PPE, helmet compatibility, and comfort over a full shift. Buy essentials first and add useful items one at a time.
- Rank accessories as essential, useful, or optional for your specific role.
- Check every accessory against a parts diagram for your exact helmet model.
- Confirm nothing presses on your SCBA facepiece seal or lifts your hood.
- Keep front-loaded weight low, since it fatigues your neck over long shifts.
- Inspect fasteners, shields, and mounts on a schedule and replace worn parts.
Table of Contents
- Start With Your Role and Hazards
- Pick Eye and Face Protection That Matches Your Helmet
- Use a Fire Helmet Parts Diagram to Check Compatibility
- Add a Fire Helmet Front Holder and Tool Retention
- Decide on Firefighter Helmet Mods Without Compromising Safety
- Apply Reflective Firefighter Helmet Stickers Correctly
- Install, Inspect and Replace Your Helmet Accessories
- Your Next Step: Build a Matched Accessory Kit
- Frequently Asked Questions
Choosing the right firefighter helmet accessories starts with one question: what does your job actually ask of your helmet? A structural firefighter in a busy city house faces different hazards than a wildland crew working brush in the mountains. The accessories that fit one role can be a poor match for another. This guide walks you through how to pick accessories that fit your role, your helmet, and your department's standards.
Helmet accessories are the add-ons that attach to or work with the helmet: eye and face shields, front holders, flashlight mounts, helmet bands, neck and ear covers, liners, and decals. Each one can change how the helmet fits, how it protects, and how it handles over a long shift. Used well, they make the helmet more useful. Used poorly, they can block your view, add weight, or interfere with how the helmet seals and sits.
Start With Your Role and Hazards
Most buying guides tell you to consider your role and hazards, then move straight to product categories. That leaves the actual decision unmade. A short selection framework fixes that: score each accessory against four filters in order, and drop anything that fails a filter before you compare brands or prices.
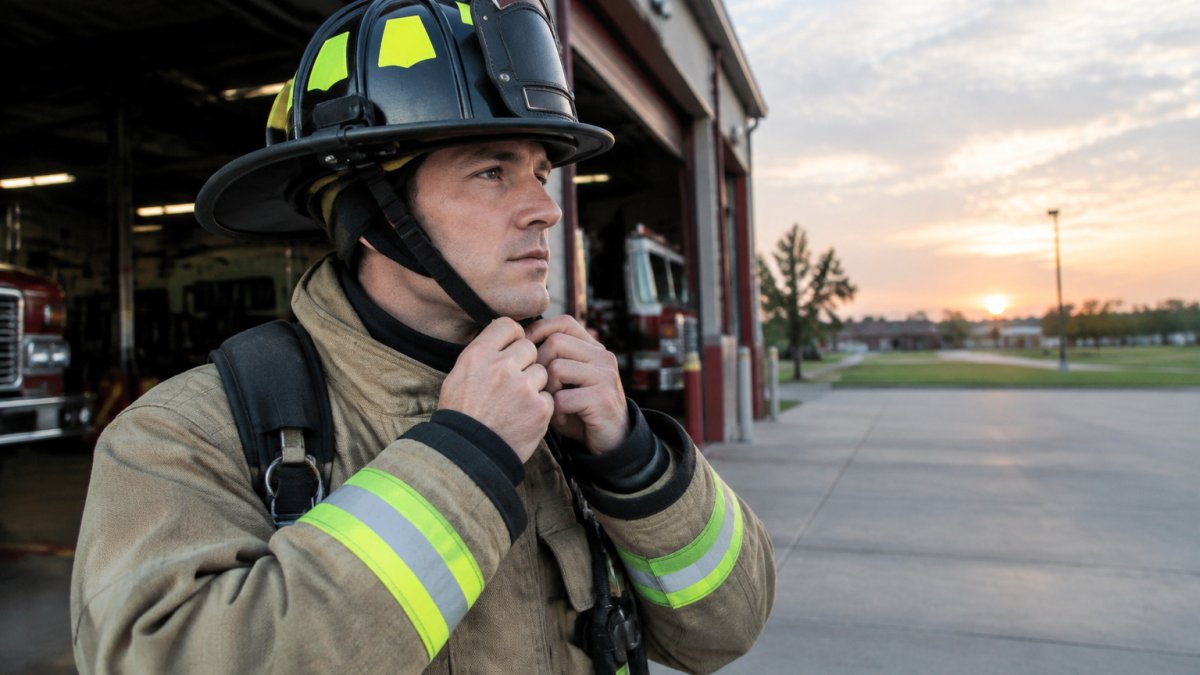
Filter 1: Primary hazard exposure. Write down the two or three hazards you meet most often in a typical month, not the worst-case scenario you have heard about. Structural interior work, vehicle extrication, wildland brush, technical rescue, and traffic/roadway incidents each stress a helmet differently. A crew that spends most shifts on roadway incidents has different priorities than a crew doing interior attack.
Filter 2: Task and PPE interface. List the other PPE you wear at the same time: SCBA facepiece, hood, ear protection, safety glasses, radio headset, and gloves. Any accessory that touches, presses on, or shifts one of those items is a candidate for rejection, regardless of how well it performs alone.
Filter 3: Helmet model and attachment points. Confirm the accessory is listed by its maker as compatible with your specific helmet model, and that your helmet actually has the mounting points the accessory needs. A parts diagram for your model is the fastest way to check this before you buy.
Filter 4: Shift-length comfort and weight. Estimate how many hours per shift the helmet stays on and how much extra weight the accessory adds at the front, side, or rear. Weight at the front of the helmet is the most fatiguing over a long shift because it pulls the center of gravity forward.
A simple way to apply the framework is to rank your candidate accessories as essential, useful, or optional for your role. Essentials are the items your job cannot be done safely without, such as a compliant eye/face shield or a secure chinstrap. Useful items improve efficiency, such as a flashlight mount or a small tool holder.
Watch out: A framework built around worst-case hazards rather than routine exposure tends to produce an overloaded helmet. Accessories added for a rare scenario often add weight, snag points, and cleaning burden on every shift.
Pick Eye and Face Protection That Matches Your Helmet
Eye and face protection is the accessory most firefighters think about first. The right choice depends on your helmet style and the work you do. Before you buy a shield or face piece, check that it attaches to your helmet's mounting points and does not shift when you move your head.
Look for these points when you compare options:
- Clear view: The shield should not distort your field of vision.
- Secure attachment: It should lock into place and stay put during movement.
- Compatibility with your mask: The shield must not press against the SCBA facepiece seal.
- Replaceable parts: Shields scratch and wear. Buy from a line that sells replacement components.
Black Helmet carries a range of pins, decals, and style pieces that can match your helmet's look. You can browse the pin and decal options to find pieces that suit your helmet style.

The four points below are the ones to check when comparing eye and face protection options.
| Check | What to look for | Why it matters |
|---|---|---|
| Clear view | Shield does not distort vision | Keeps your field of vision accurate |
| Secure attachment | Locks in place and stays put | Prevents shifting during movement |
| Mask compatibility | Does not press on the SCBA seal | Protects the facepiece seal |
| Replaceable parts | Manufacturer sells replacements | Shields scratch and wear over time |
Use a Fire Helmet Parts Diagram to Check Compatibility
A fire helmet parts diagram shows where each component sits and how it connects. Use one before you buy anything. Match the accessory to the mounting points, slots, and brackets on your specific helmet model. Once the fit is confirmed, keep fire safety and rescue resources in view as you consider how each accessory supports safe, effective work.
Here is a simple way to check compatibility:
- Find the helmet model and manufacturer on the label inside the helmet.
- Pull up a parts diagram for that model.
- Mark the mounting points you plan to use.
- Confirm the accessory lists your helmet model as compatible.
- Do a dry fit before you commit to any permanent install.
A parts diagram also helps you spot which pieces are removable and which are fixed. Removable components are easier to replace, clean, and swap between helmets.
Add a Fire Helmet Front Holder and Tool Retention
A front holder and retention system are where most helmets become either more useful or more cluttered. The difference comes down to how the holder attaches, how much load it carries, and whether it interferes with the rest of your PPE. Work through those three points before you add anything.
Attachment method. Front holders and bands attach in a few common ways: through the helmet's front slot or bracket, around the shell with a band, or with clips that grip the brim. Each has trade-offs.
Load and balance. Keep the total added weight at the front of the helmet low. A single flashlight or a small tool is a reasonable load; a cluster of tools, a radio, and a camera is not.
Retention and access. The holder should keep the item secure during climbing, crawling, and rapid head movement, and you should be able to reach it without removing the helmet.
Interference checks. Before you commit, check the holder against the SCBA facepiece, the hood, ear protection, and any headset. The holder and its contents should not press on the facepiece or lift the hood away from the seal.
Helmet band fit. A band adds retention for accessories, but it also adds a snag point and a place for debris to collect. Check that the band stays snug, does not roll at the edges, and does not cover reflective markings you rely on for visibility.
A practical sequence is to install the holder first, dry-fit the item you plan to carry, then add the band only if the holder alone does not retain the item securely. Start with one item and add a second only when your role clearly calls for it.
Decide on Firefighter Helmet Mods Without Compromising Safety
Helmet mods are changes to the helmet's shape, finish, or structure. Some mods are simple cosmetic changes, such as paint or decals. Others alter how the helmet fits or protects you. Be careful with any change that touches the shell or the suspension.
Before you modify a helmet, ask these questions:
- Does the change affect the shell or the suspension? Structural changes can weaken protection.
- Does the manufacturer approve the change? Check the manufacturer's guidance before you modify anything.
- Does your department allow it? Many departments set rules on helmet modifications.
- Will it affect certification? Some protective gear loses its certified status once modified.
Watch out: A mod that seems harmless can void your helmet's certification or change how it performs in a crash or fall. When in doubt, skip the mod or ask your department and the manufacturer first.
Apply Reflective Firefighter Helmet Stickers Correctly
Reflective firefighter helmet stickers help crews see you in smoke, low light, and traffic. They also show your department and rank. For the stickers to work well, apply them the right way.
- Clean the surface first. Remove dirt, oil, and old residue with a mild cleaner.
- Let the surface dry fully. Moisture trapped under a sticker causes peeling.
- Apply in a warm, dry setting. Cold surfaces make adhesive grip poorly.
- Smooth from the center outward. This pushes out air bubbles.
- Avoid the shell's curved edges where possible. Tight curves can lift stickers over time.
Black Helmet offers firefighter gear and apparel you can pair with your helmet look, including tees for off-duty wear.

Install, Inspect and Replace Your Helmet Accessories
Good installation keeps accessories working and safe. Inspect them on a set schedule, and replace worn parts before they fail.
Use this checklist after each install and at regular intervals:
- Every fastener is tight and none are cross-threaded.
- Shields lock in place and do not rattle.
- Mounts show no cracks, warping, or heat damage.
- Straps and bands are not frayed or stretched.
- Reflective stickers are flat, clean, and fully adhered.
- Nothing blocks your view or interferes with your SCBA seal.
Clean accessories with the cleaner your manufacturer recommends. Harsh solvents can cloud shields and weaken plastics. Replace any part that cracks, clouds beyond use, or loses its grip.
Follow the inspection and replacement guidance your department uses. For a deeper look at inspection standards, the National Fire Protection Association publishes helmet and protective equipment standards at NFPA 1971 protective ensemble standards. Your department's policy controls what you must inspect and when.
Your Next Step: Build a Matched Accessory Kit
Start with your role and hazards, then pick the accessories that match them. Check each piece against your helmet's parts diagram, add only what your job needs, and inspect the kit on a regular schedule. A matched kit works better than a random collection of add-ons.
Browse our full line of firefighter apparel to find pieces that fit your role, your station, and your style.
Frequently Asked Questions
What are the best accessories for a firefighter helmet?
The most useful accessories depend on your role. Eye and face protection, a flashlight mount, a front holder for tools and a comfort liner cover the needs of most structural firefighters. Wildland and rescue crews may prioritize neck and ear protection and secure tool retention. Choose accessories that your department approves and that are compatible with your specific helmet model. Confirm fit with your training officer before you buy, and check the manufacturer's instructions for every attachment point.
What is a fire helmet front holder used for?
A front holder attaches to the front of the helmet and secures items such as a tool, a flashlight or a radio so they stay within reach without interfering with the face shield or eye protection. It keeps the front of the helmet clear and reduces the chance of dropping equipment during operations. Make sure the holder mounts on the helmet's designed attachment points and does not block the shield's movement or the helmet's ventilation.
Can you add stickers or reflective markings to a fire helmet?
Many departments allow reflective markings and identification stickers, but rules differ by department and by helmet manufacturer. Some manufacturers warn that adhesives, coatings or added materials can affect the helmet shell. Before applying anything, check your department's policy and the helmet's manufacturer documentation. Apply stickers to clean, dry, approved surfaces and avoid covering vents, labels or certification markings.
How can you check whether a helmet accessory is compatible with your helmet?
Start with the manufacturer's list of approved accessories for your helmet model and year. Compare the attachment points, mounting hardware and any fit specifications against the accessory's packaging. Test the fit on the helmet before a shift, confirm the accessory does not interfere with the shield, straps or breathing apparatus, and confirm nothing shifts or rattles during movement. Ask your department's safety officer when the manufacturer's guidance is unclear.

